Install the Add-on
How to install and authorize the Bkper Add-on for Google Sheets from the Google Workspace Marketplace.
The Bkper Add-on for Google Sheets connects your Bkper Books to Google Sheets, enabling custom reports, data analysis, and automated Transaction recording.
For the complete reference — all Bkper Functions, column headers, and recording behavior — see the Google Sheets Add-on README.
Installing the Add-on
Open a new or existing Google Sheet and navigate to Extensions >> Add-ons >> Get Add-ons. Search for “Bkper” and select it from the results. Click Install, then Continue, and choose your Google account. Review the permissions Bkper requires and click Allow to complete the installation.
Authenticating for First Use
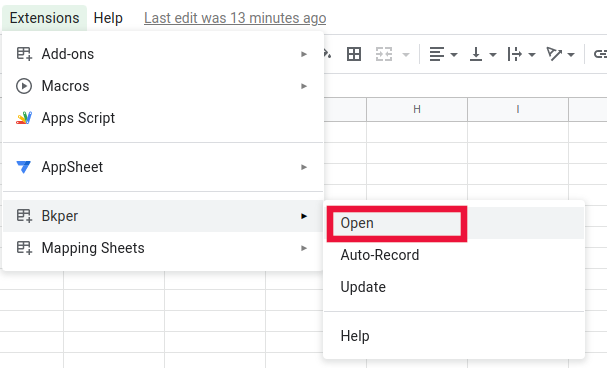
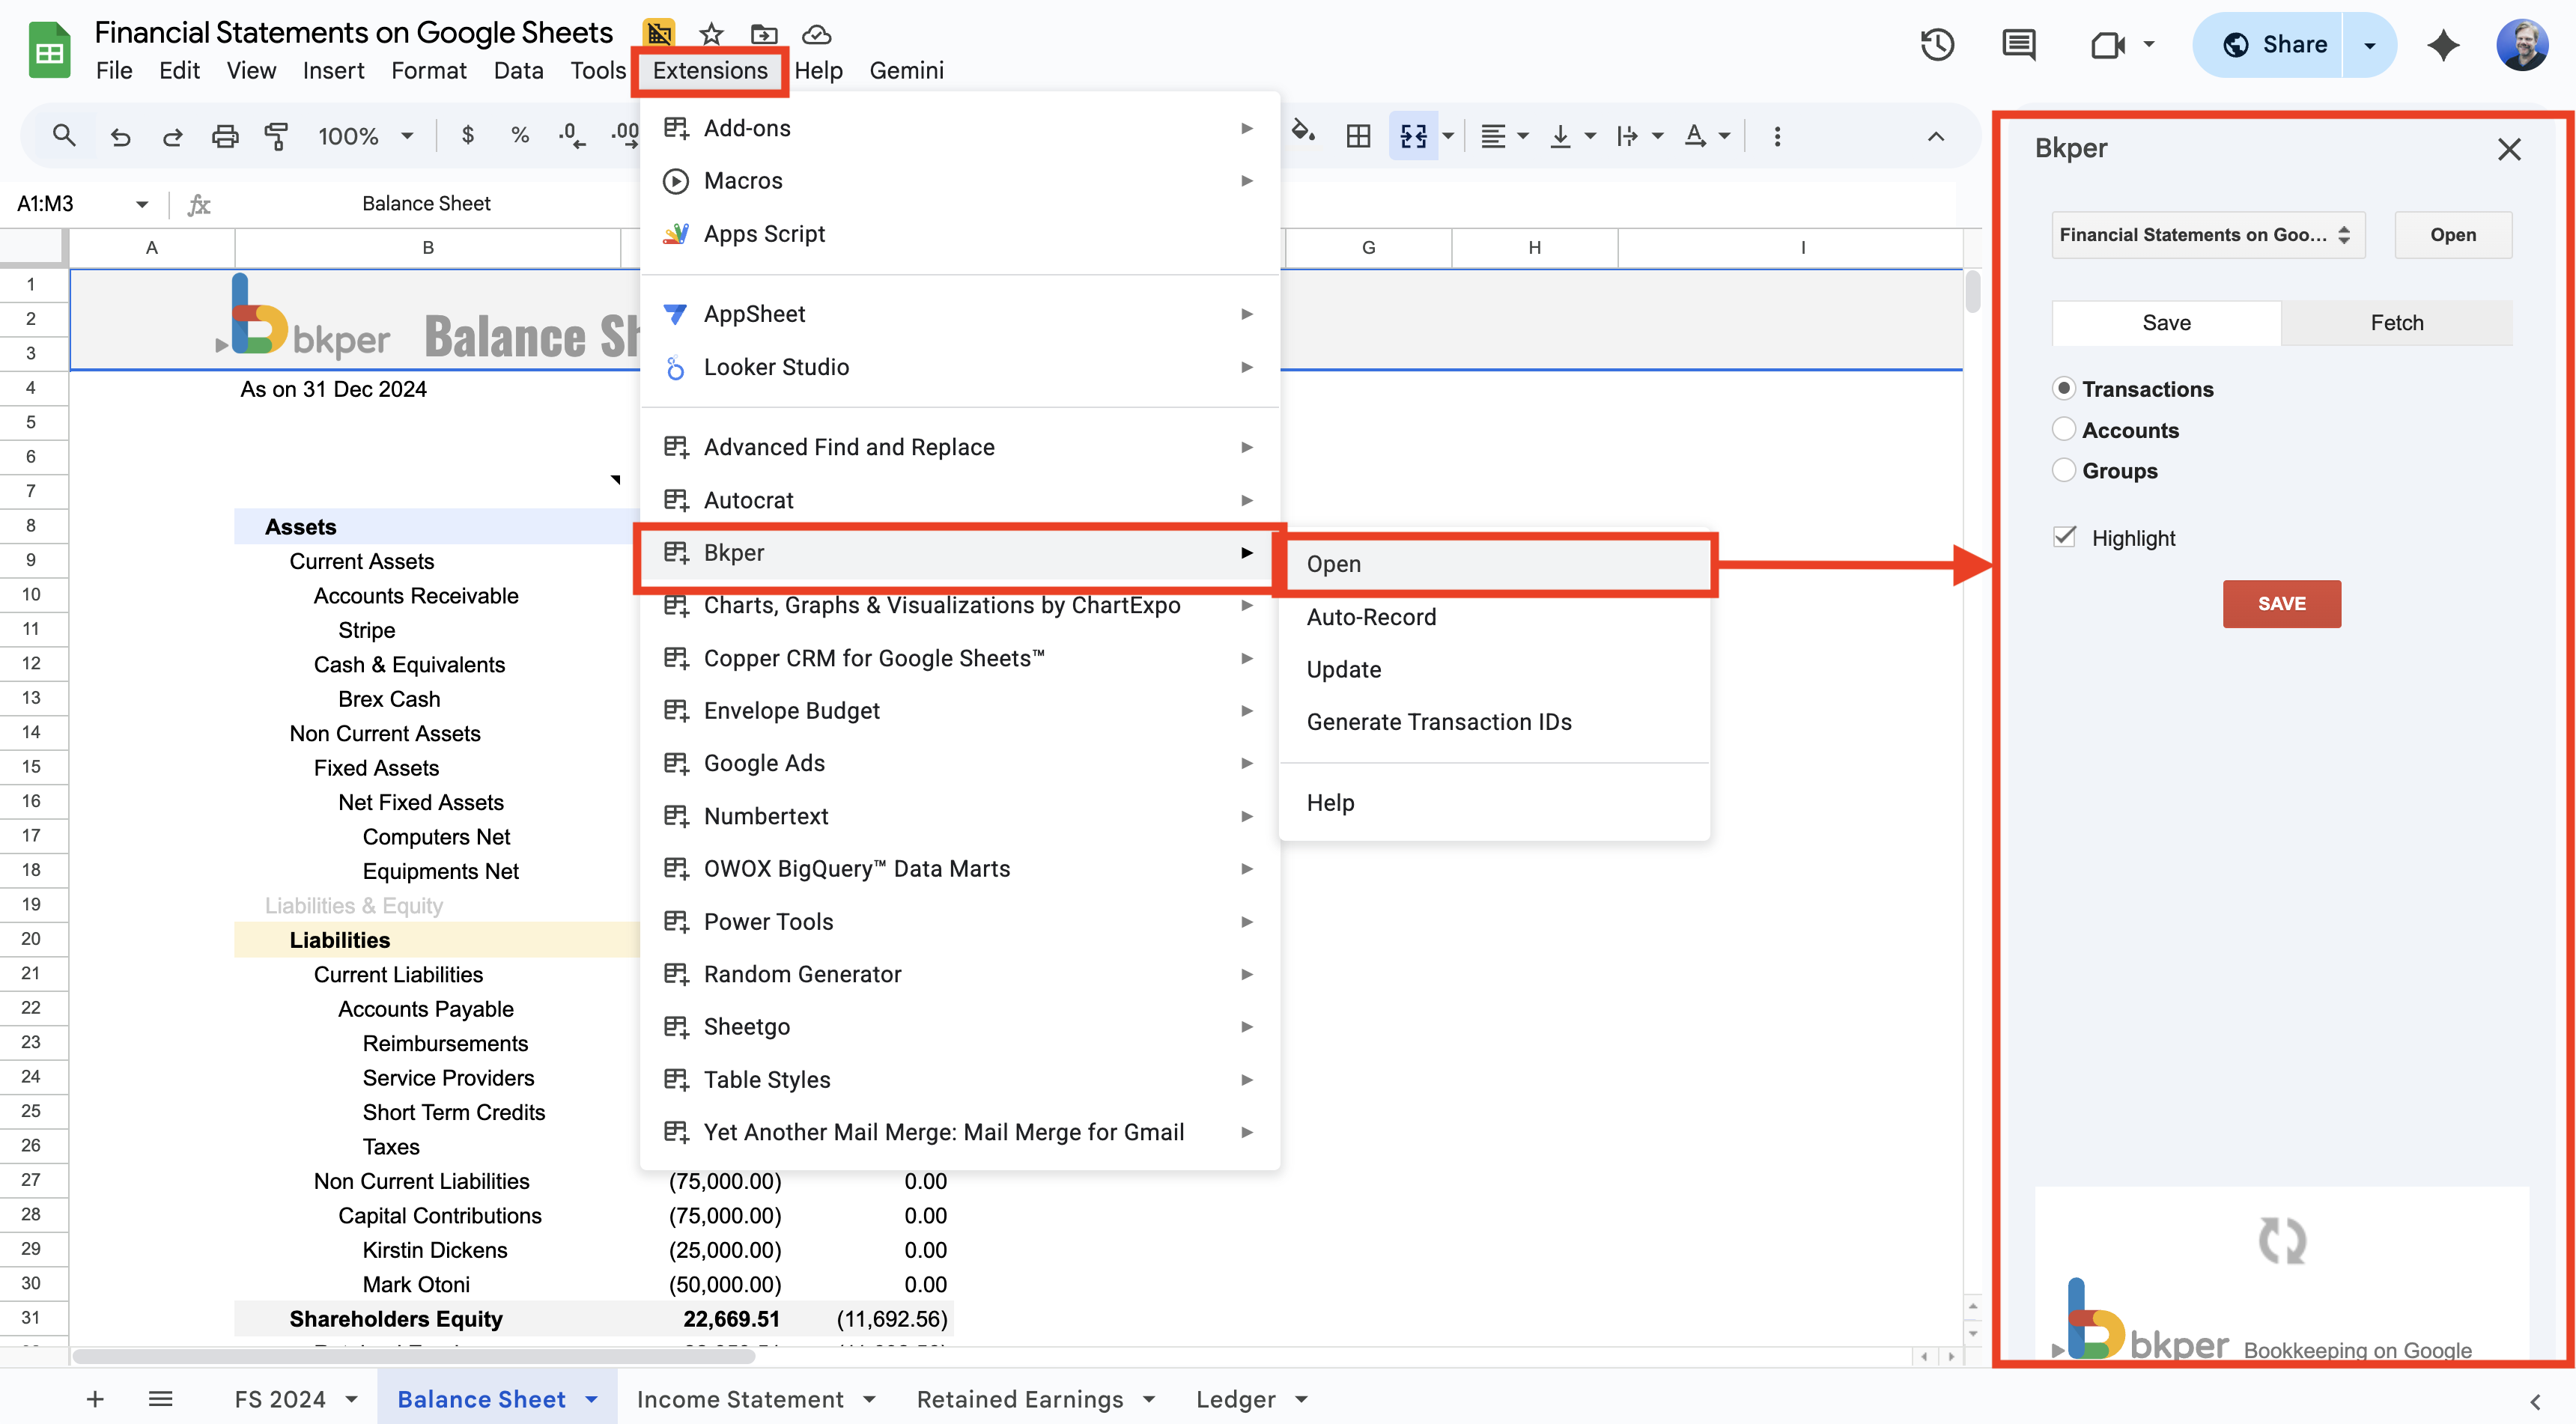
The first time you use the Add-on, you need to connect it to your Bkper account. Open the Add-on from Extensions >> Bkper >> Open.
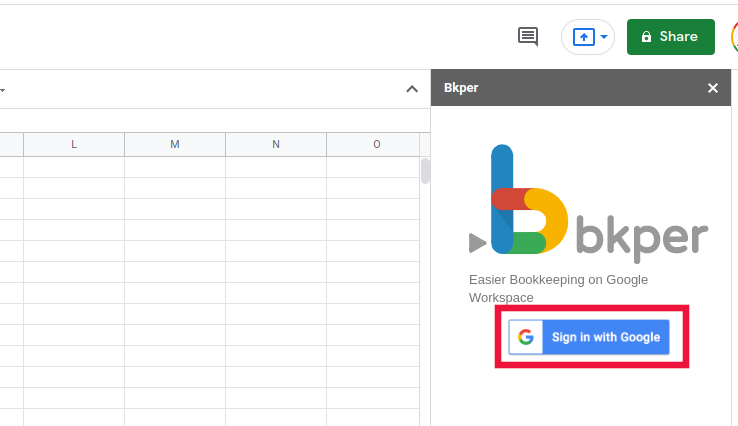
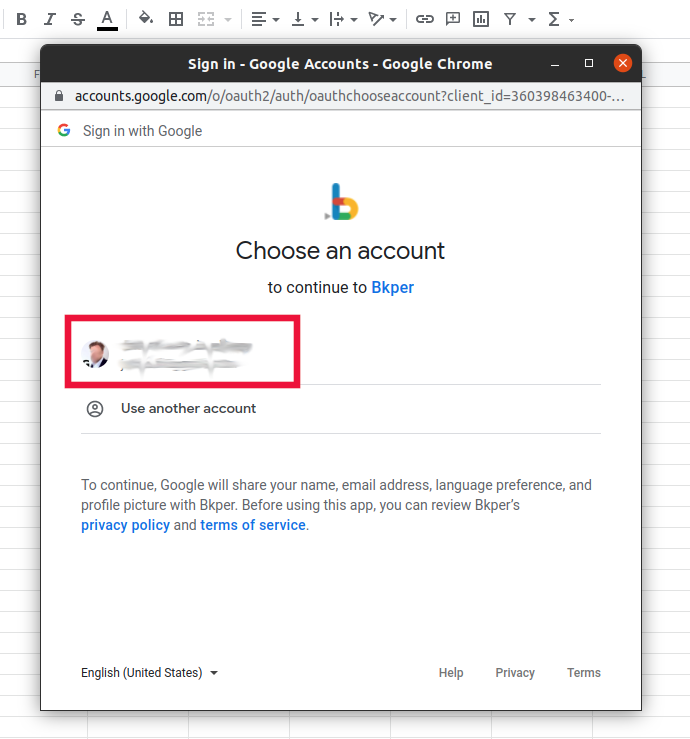
In the sidebar, click Sign in with Google and select the account associated with your Bkper Books.
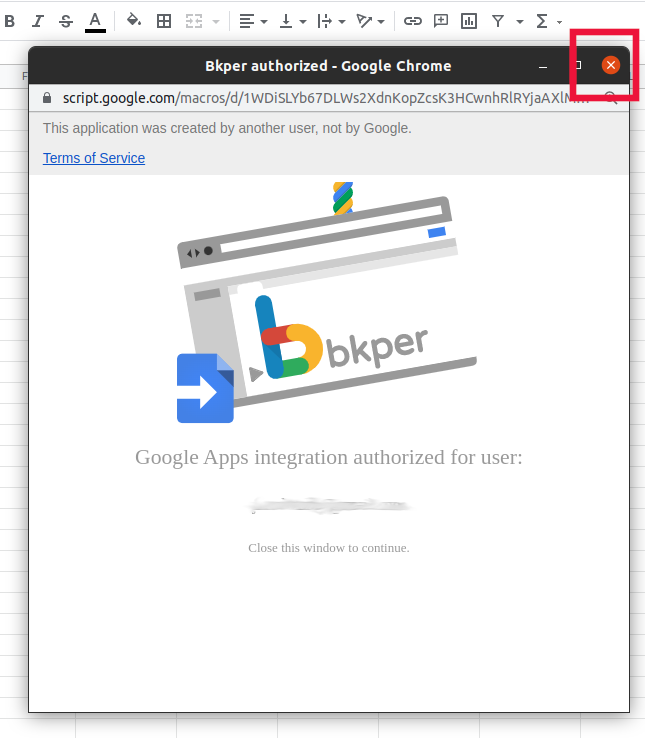
Once authorized, close the confirmation window and you’re ready to use the Add-on.
What’s Included
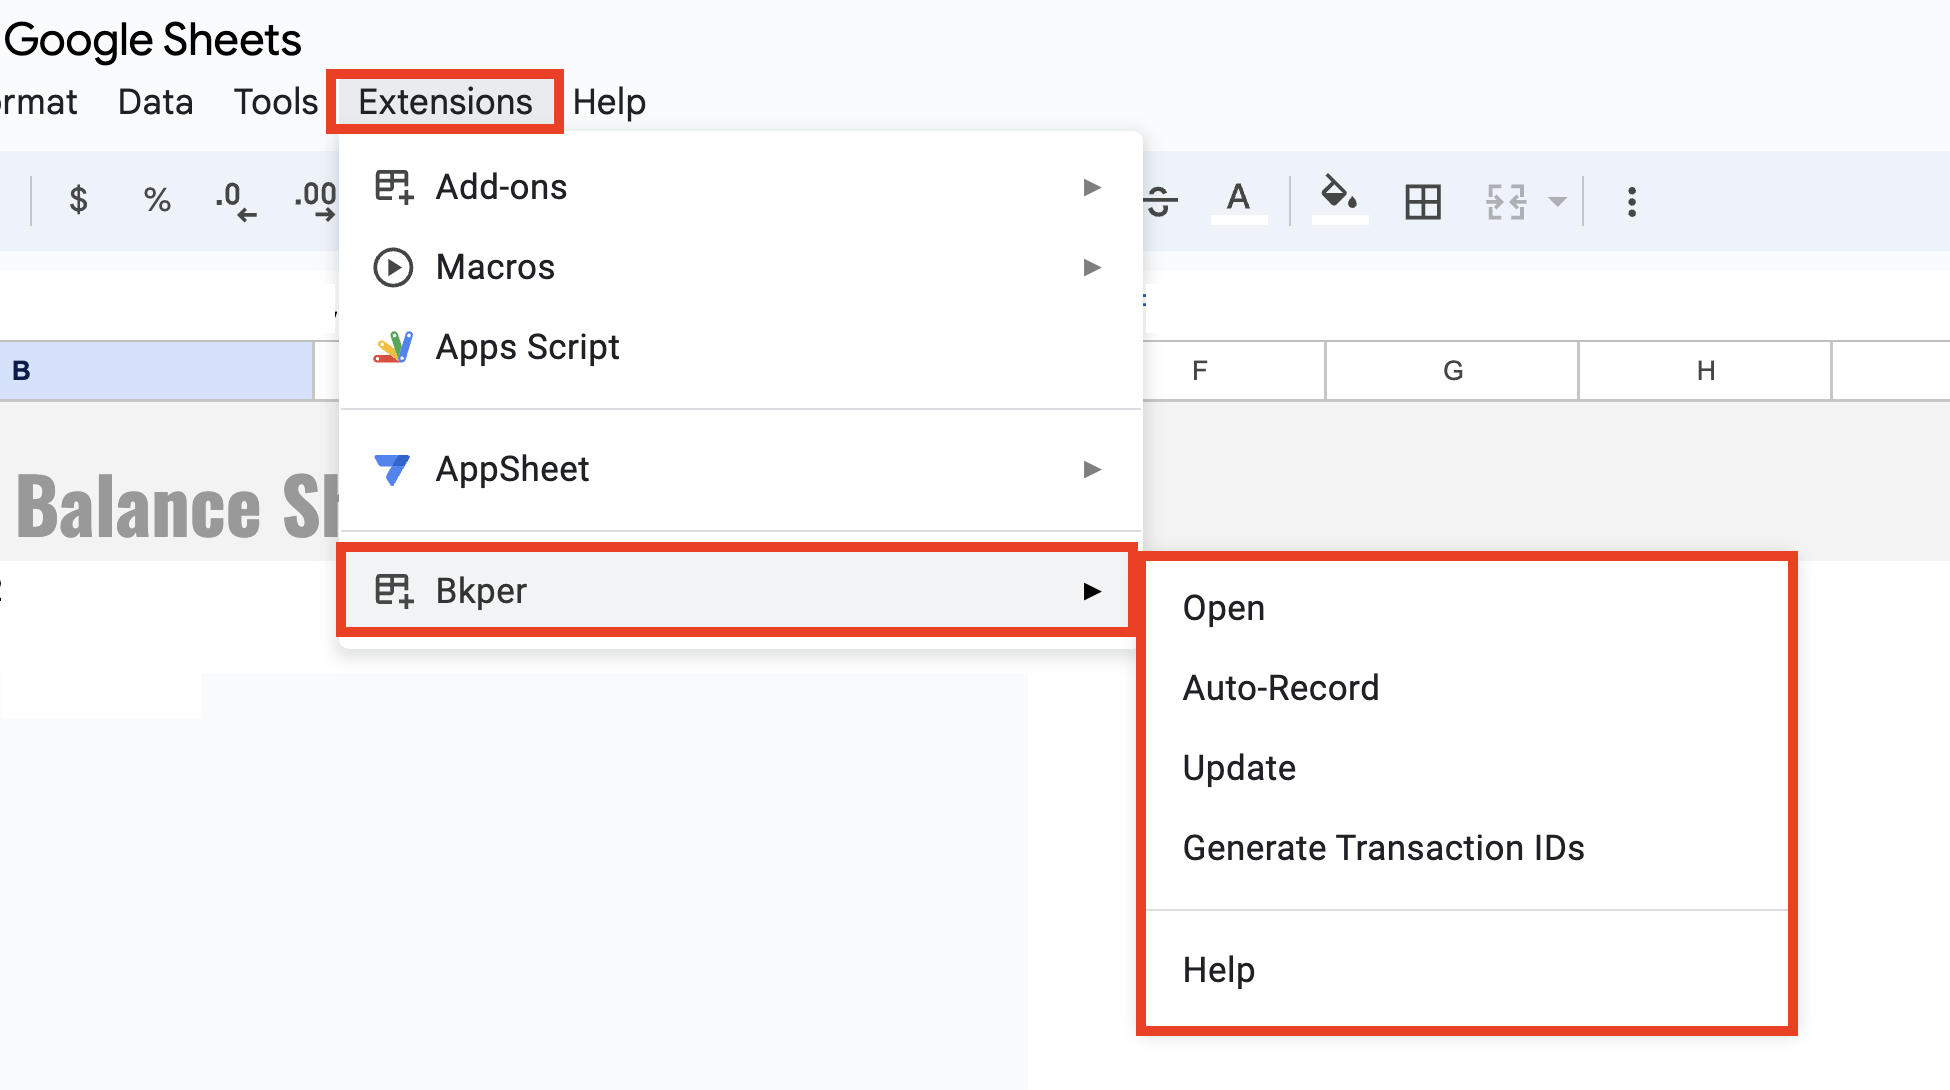
The Add-on provides several features accessible from Extensions >> Bkper:
Sidebar — Browse and select Books directly within Sheets.
Auto Record — Automatically record Transactions from spreadsheet data as new rows are added.
Update — Refresh all Bkper functions in your Sheet with current data.
Generate Transaction IDs — Create unique identifiers for Transactions to prevent duplicates.
Bkper Functions — Type =BKPER_ in any cell to access custom functions for pulling Account balances, Transaction data, and more.
Using the Add-on Sidebar
The Add-on Sidebar is a Bkper extension that turns Google Sheets into a powerful accounting tool. It helps you build financial statements, and batch record and batch edit Transactions in your Books in an easy and intuitive way.
Fetch Tab
Build reports on Google Sheets by fetching balance values from Bkper. The sidebar is a wizard that helps you fetch relevant data for your reports intuitively.
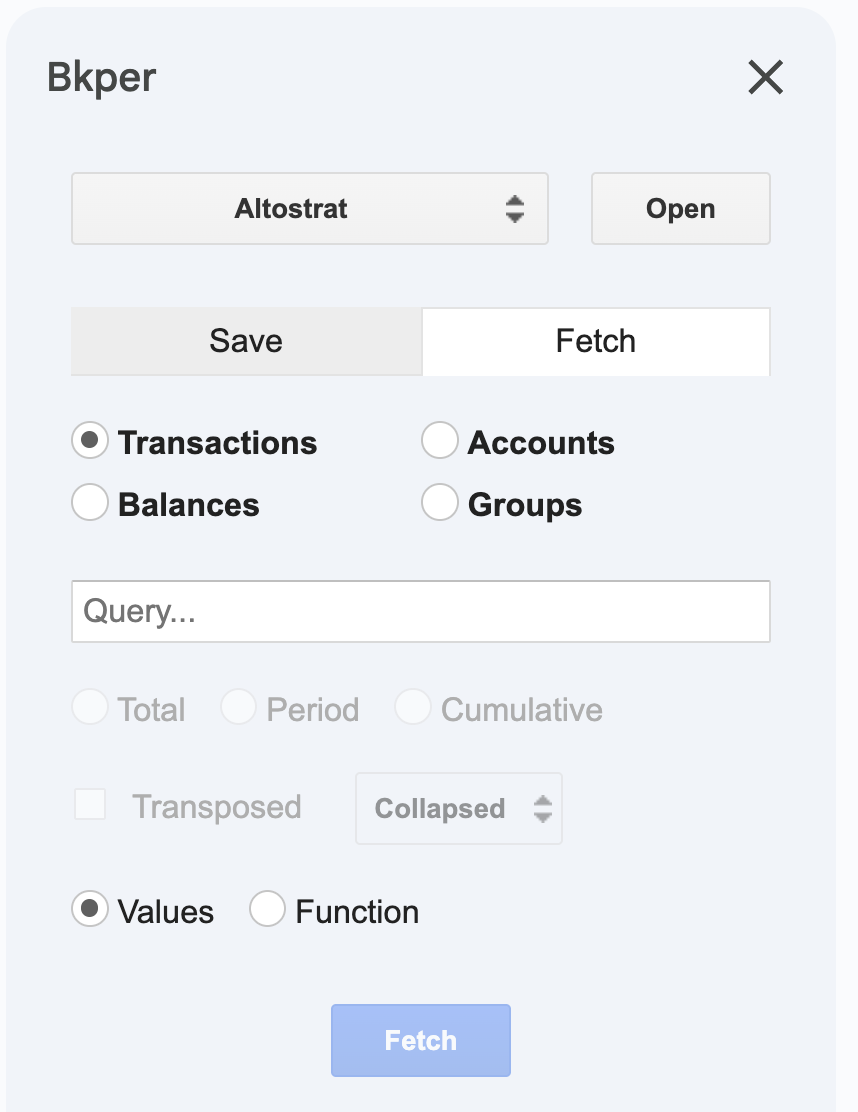
Besides Balance Values, you can also fetch Transactions, Accounts, and Groups from your Book. See the Functions Reference for all available functions and their parameters.
When you fetch data with the sidebar wizard, it automatically generates the correct Bkper Function and inserts it in the selected cell.
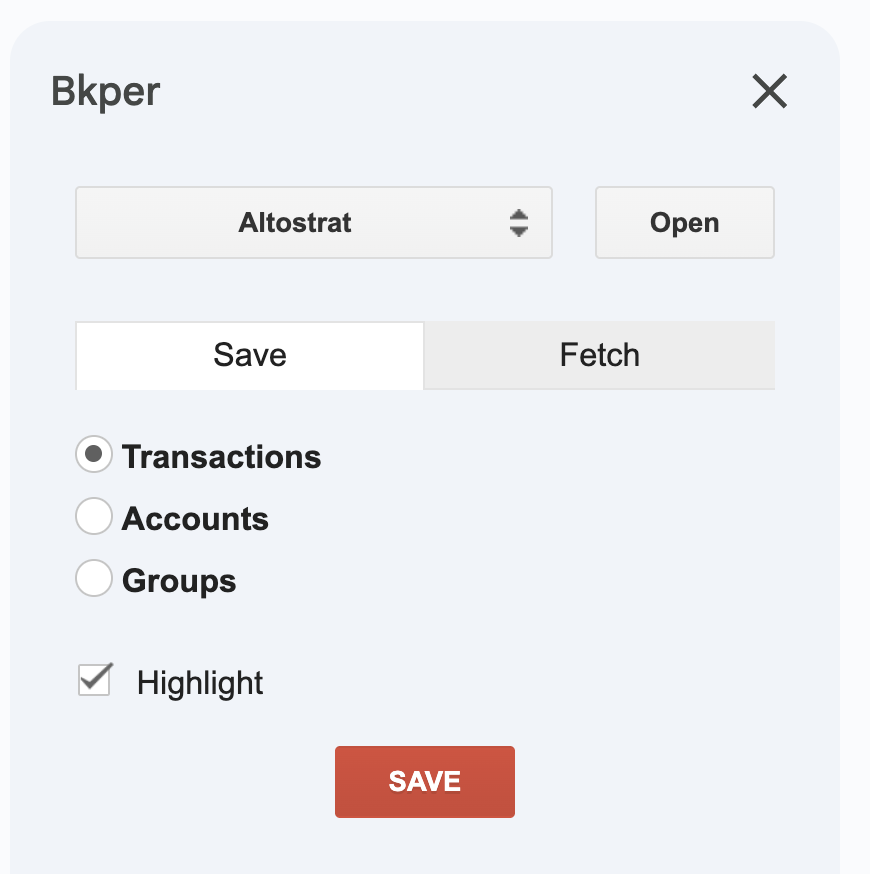
Save Tab
Save Transactions, Accounts, and Groups from the sidebar. See the Recording Reference for all recognized column headers and recording behavior.
Updating and preventing duplicates
When sending data from Google Sheets to Bkper, the column headers you use determine what happens to each row.
Update existing transactions with Transaction ID
If you want to edit transactions that already exist in your Book, first fetch them into your sheet.
Each fetched row includes a Transaction ID generated by Bkper. Keep that column and its header unchanged. When you edit the row and save it back, the Add-on uses the Transaction ID to find the existing transaction in your Book and update it instead of creating a new one.
If a row has an empty Transaction ID cell, Bkper treats it as a new transaction and records it as a new entry.
Prevent duplicates for new transactions with ID
If you are importing new data into Bkper — such as bank lines, invoices, or transactions prepared in Sheets — you can use a separate column named ID.
In this column, enter your own unique identifier from the source data, such as a bank reference, invoice number, or row identifier. Bkper uses this value to help prevent the same transaction from being recorded more than once.
Unlike Transaction ID, the ID column does not update an existing transaction. It is only used to identify new rows and avoid duplicates.
Recommended header setup
To make sure the Add-on recognizes your columns correctly, use the first row as the header row and freeze it in Google Sheets (View → Freeze → 1 row).
Summary: which column should you use?
| Column header | Where the value comes from | What it does | Best used for |
|---|---|---|---|
| Transaction ID | Generated by Bkper when you fetch transactions | Updates an existing transaction | Editing transactions already stored in your Book |
| ID | Provided by you from the source data | Helps prevent duplicate posting | Importing new transactions from Sheets, bank exports, or invoices |
| (empty Transaction ID) | — | Creates a new transaction | Adding brand new transactions |
Generating Unique IDs
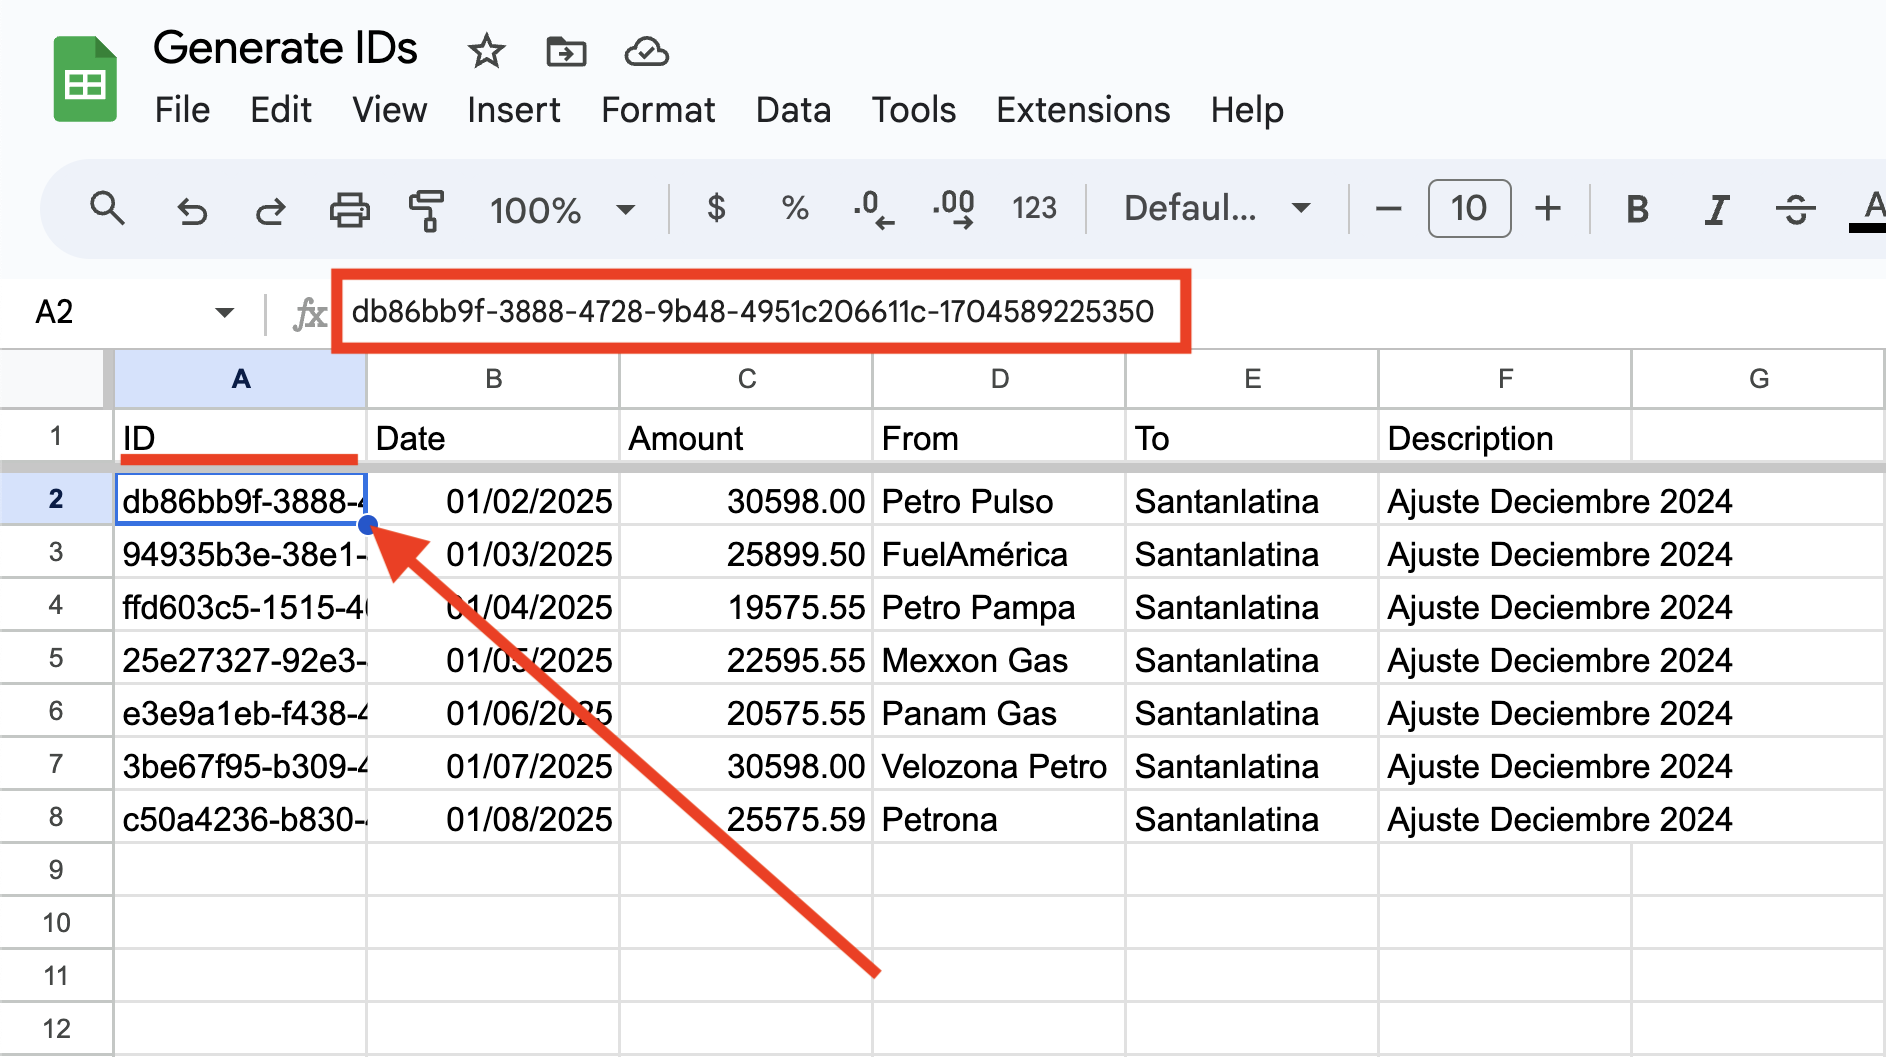
Assigning a unique ID to records on Google Sheets makes Transactions idempotent — a Transaction with a unique ID cannot be recorded twice in the same Book.
Freeze the first row of your Sheet with the column headers, and add an ID column alongside the system properties.
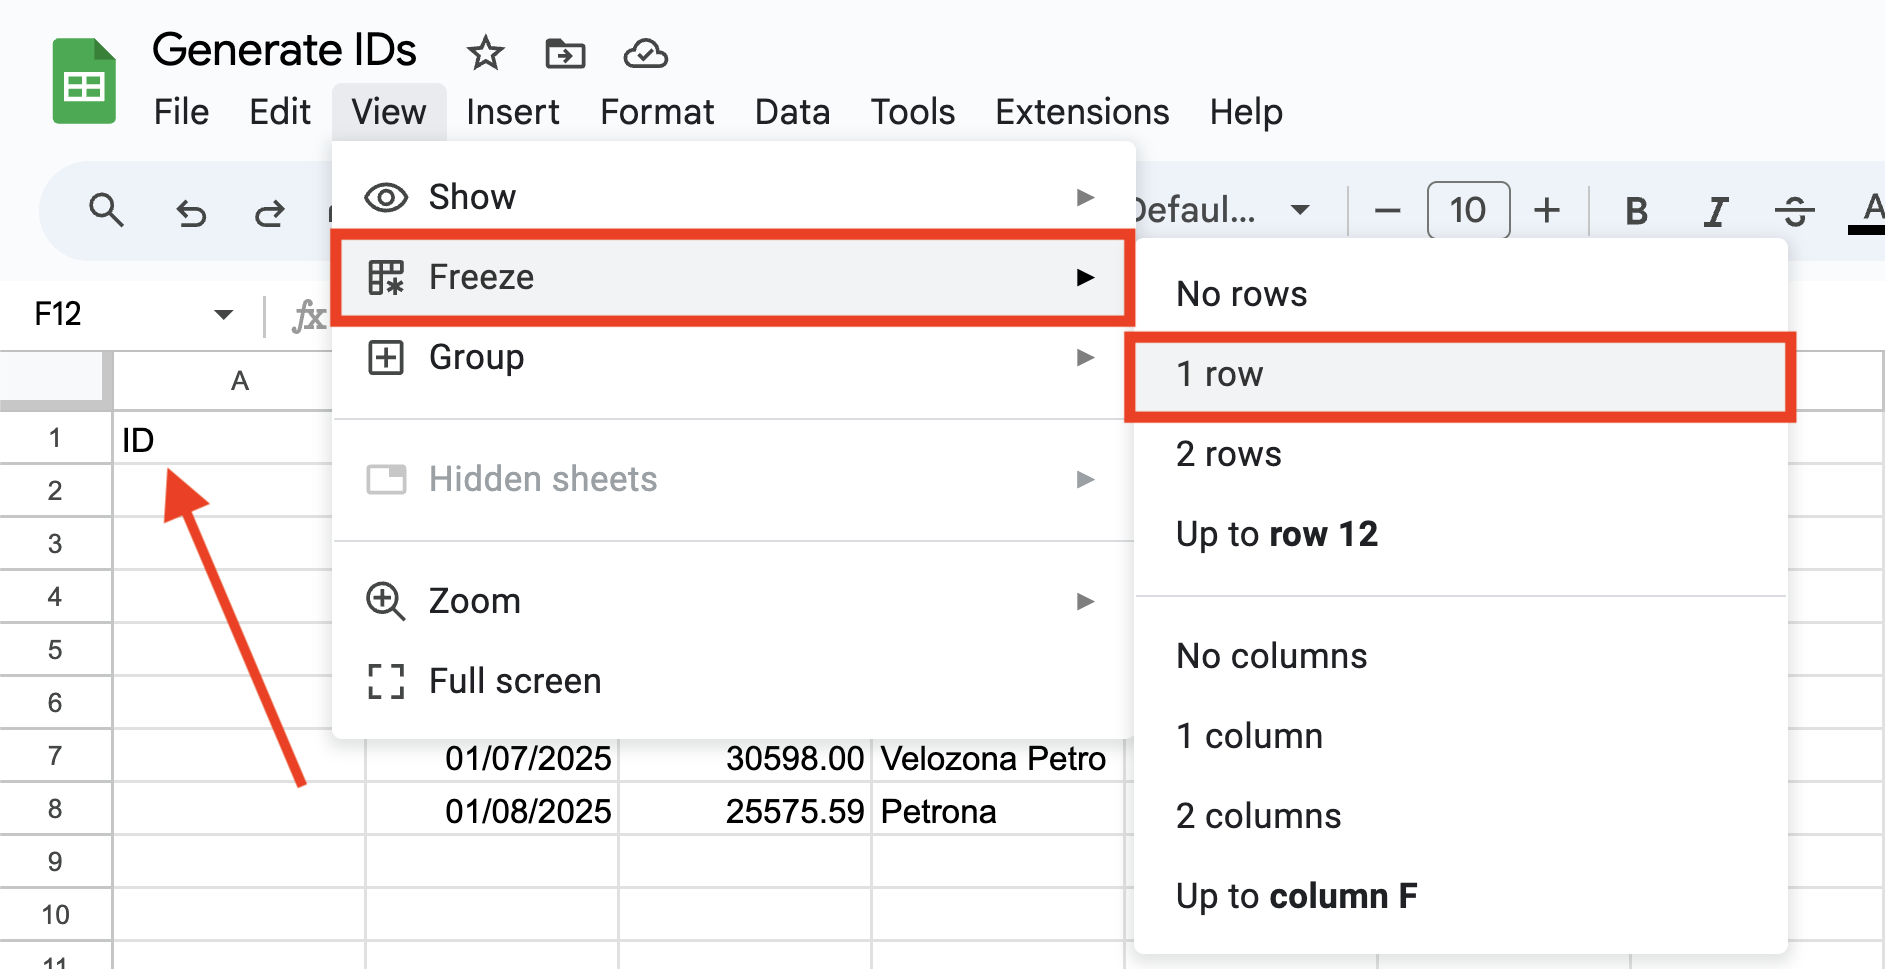
After freezing the first row, go to the Bkper extension and select Generate Transaction IDs.

The unique IDs are inserted in each row that has data.
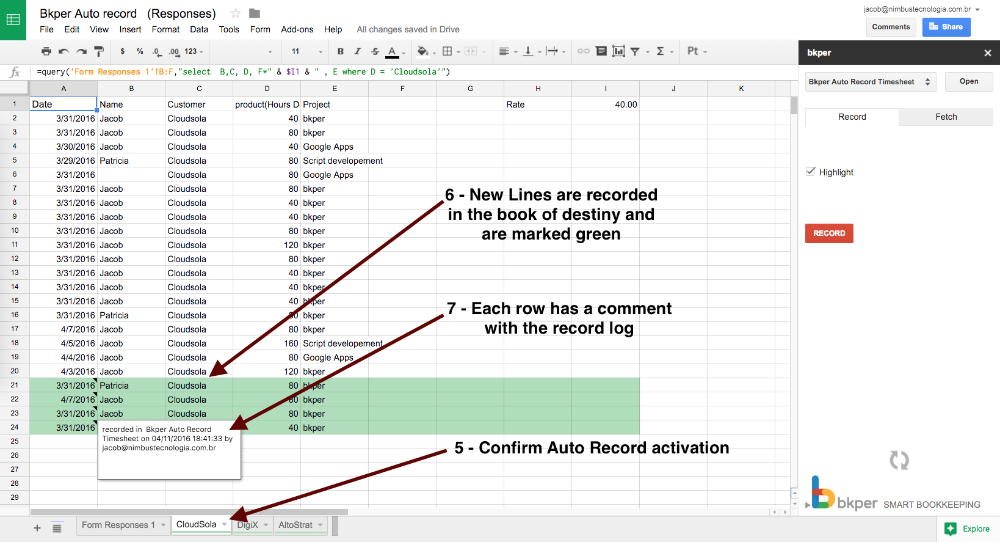
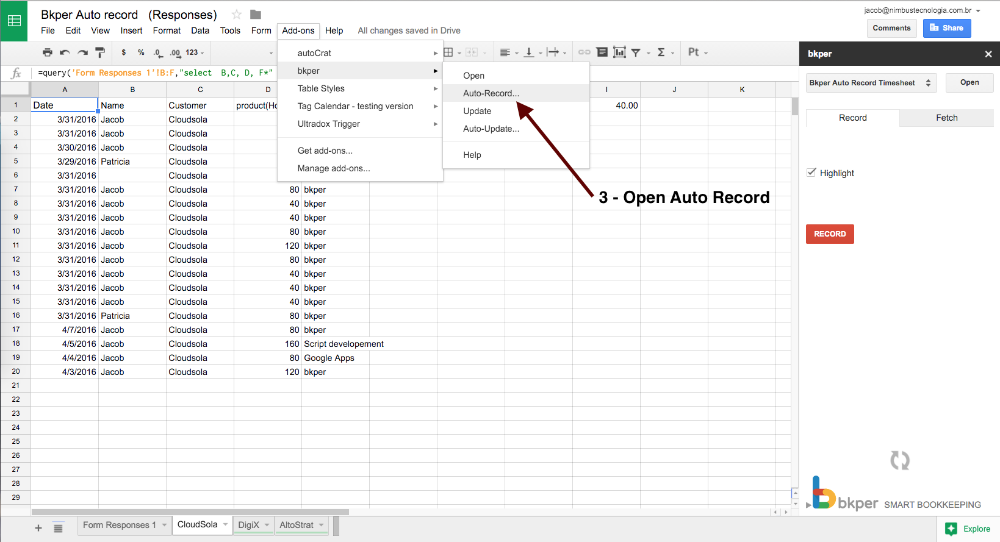
Auto Record
Activate Auto Record on a tab, and each new row added to a Google Sheet is automatically recorded as a new entry in your Bkper Book. This is especially handy when data flows into your Sheet automatically — from a Google Form, a QUERY formula, or another integration.
Setting Up Auto Record
Open the sidebar from the Add-on menu and select the Book where you want to record the Transactions. Prepare the data you want to record automatically.
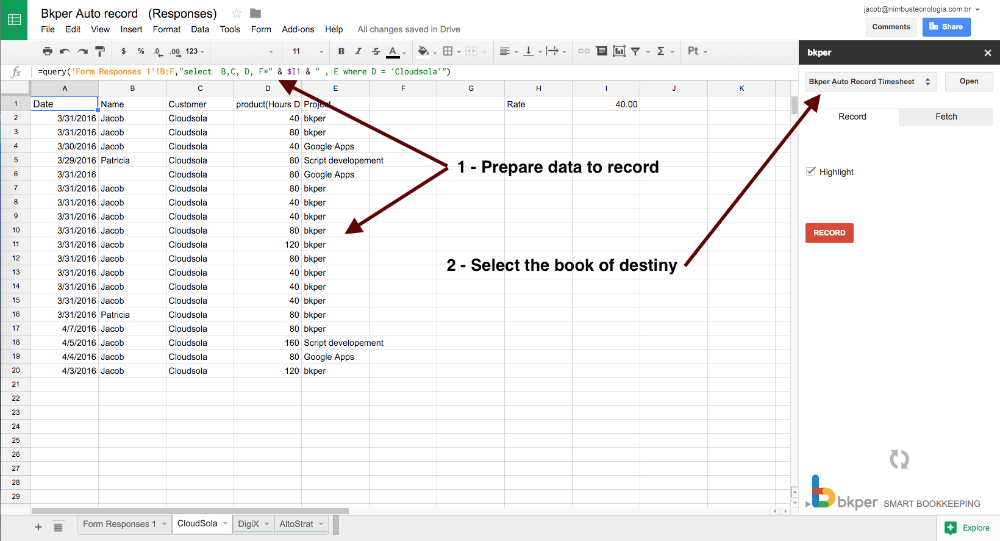
Select Auto Record on the Bkper Add-on menu.
Toggle the Auto Record switch to YES.
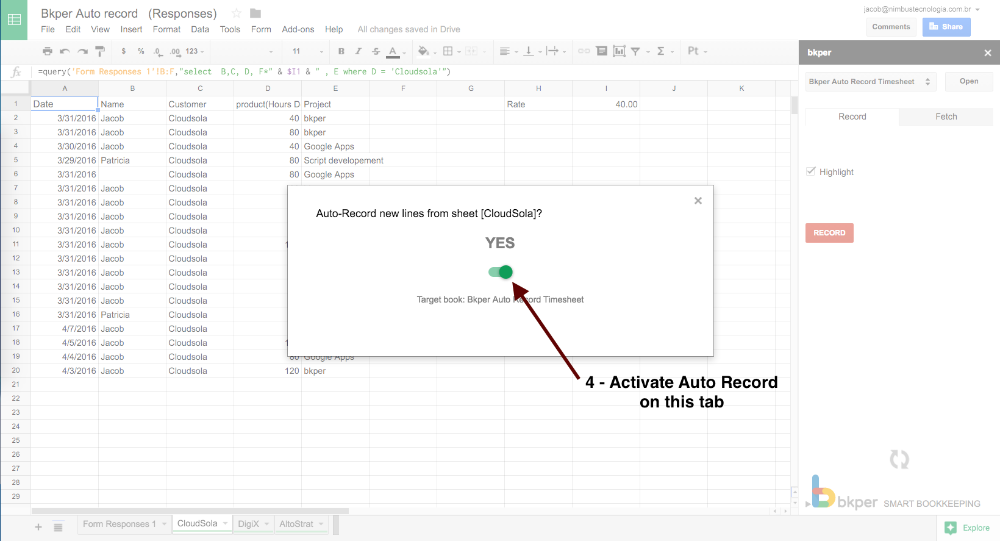
New rows on the tab are now automatically recorded in your Bkper Book.